- Download and install the Virtual Com port software driver. This will allow connection of N1MM+ and RemoteTx Connect.
https://remotetx.s3-us-west-1.amazonaws.com/com0com-2.2.2.0-x64-fre-signed.zip
- Download and install RemoteTx Connect software. It will give some warning messages because the install package is not digitally signed. It will put a startup icon on the desktop.

https://remotetx.s3.us-west-1.amazonaws.com/RemoteTxConnectSetup-V1.4.zip
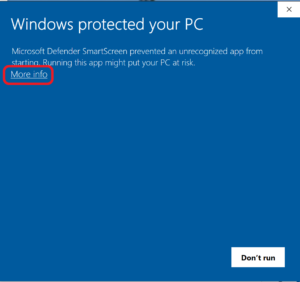
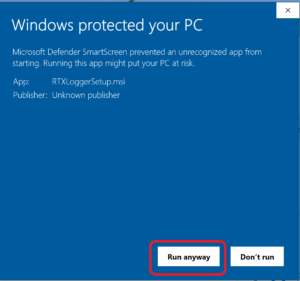
- Open a browser and connect to your radio with RemoteTx.net:
https://<your-callsign>.remotetx.net
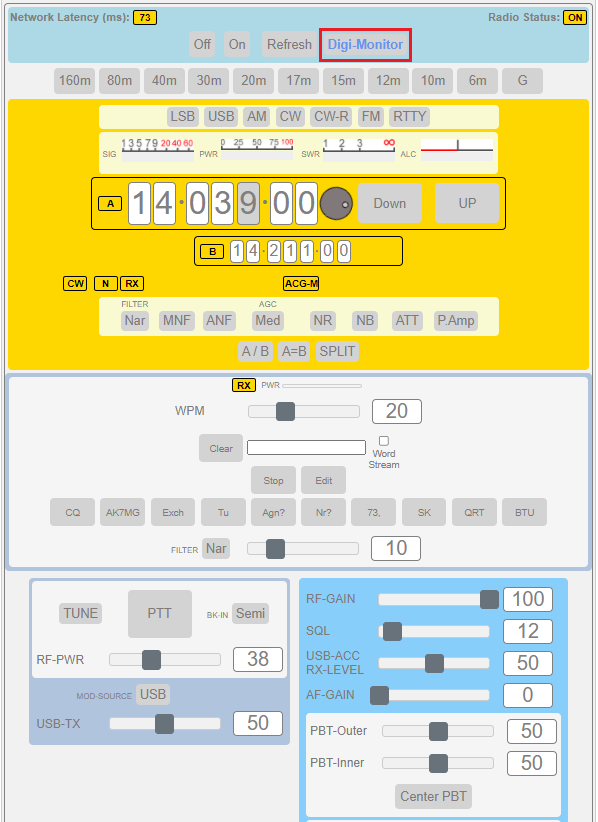
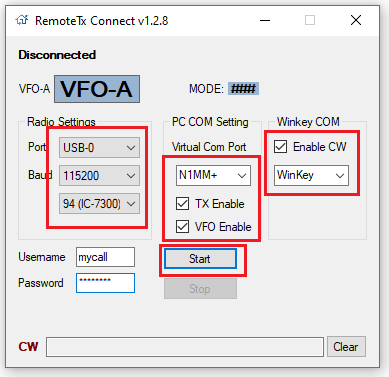
Click the ‘Digi-Monitor’ button on so that VFO changes made from N1MM+ (bandmap etc.) will be updated on the web interface. - Start RemoteTx Connect and set it to N1MM+ and WinKey, USB-0, 115200 baud, your Icom radio and put in the user (CallSign) and password and click ‘Start’.
- Setup N1MM+ logger to use the basic Kenwood radio on port COM60 with 4800 baud and the settings below.

- Setup N1MM+ logger to use Winkey for CW operation on COM70.
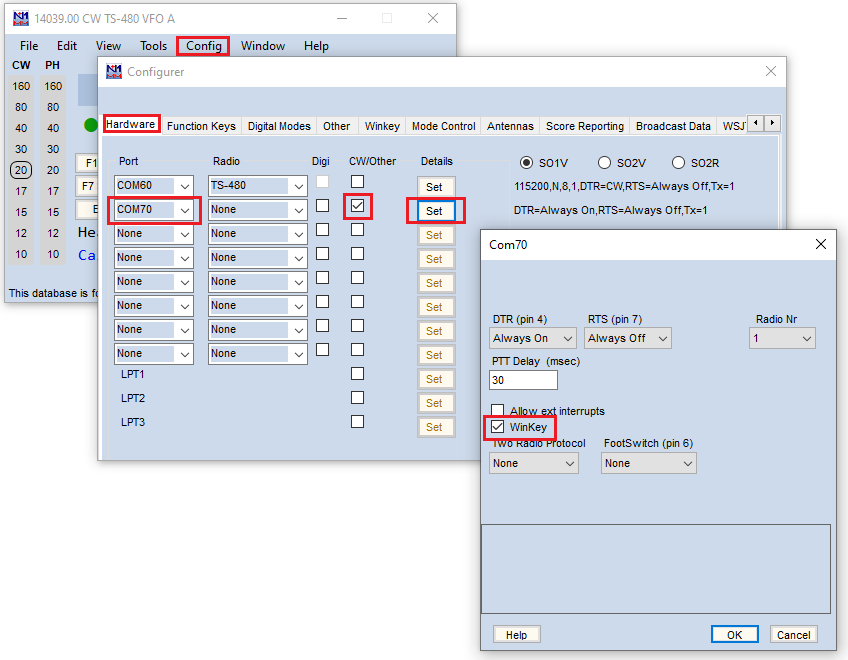
- You should now be able to send CW with the Function keys and Contrl-K CW capabilities of N1MM+.
NOTES:
- Startup order of programs is:
1 – Log in to callsign.remotetx.net and connect to the web radio control interface.
2 – Start PC RemoteTx Connect utility and log in/start.
3 – Finally, start N1MM+; WAIT ABOUT 30 SECONDS FOR N1MM+ TO INITIALIZE BEFORE SENDING CW.
4 – Set the N1MM+ cw setting to 30 wpm, then use the RemoteTx web interface (not N1MM+) to actually control the CW speed. - To view the Port Pairs that the RemoteTx Connect Setup created during setup, open the com0com utility.
The icon to start com0com is found in the com0com folder in the windows start menu. It is named ‘Setup’.

You should see something like this:
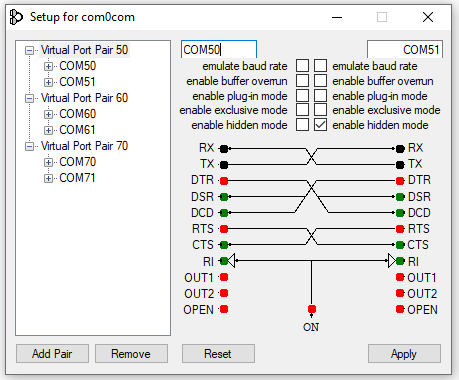
- COM50<->COM51 is for WSJT-X and FT8.
- COM60<->COM61 is for N1MM+ or other logging programs.
- Com70<->COM71 is for the WinKeyer Emulation Integration in N1MM+.